Shooting Ice Hockey Behind the Glass: A Complete Field Guide
Scratched acrylic, mixed lighting, and a puck moving faster than your reaction time. Everything I have learned about photographing ice hockey in British rinks — from where to stand to what to leave in the bag.
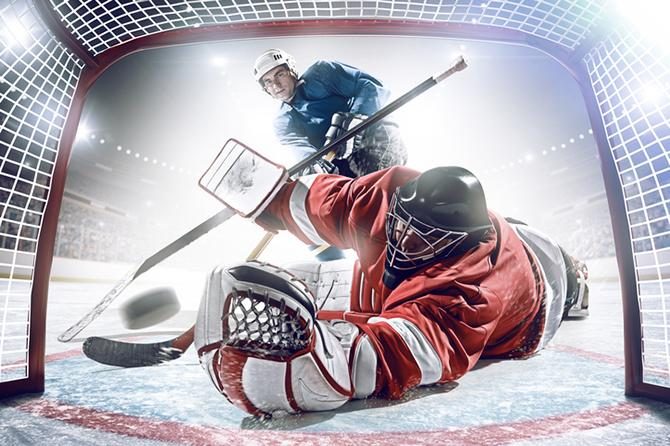
Ice hockey punishes every weakness in a sports photographer's technique at once. The light is dim and the wrong colour, the subjects are moving at speeds that make football look sedate, and there is a sheet of scratched acrylic between you and everything worth photographing. It is also, frame for frame, the most rewarding sport I shoot.
I photographed my first game as a volunteer for a local club, borrowed a lens I could not afford, and came home with four hundred frames and about six usable pictures. The following season I came home with the same number of frames and sixty keepers. Nothing about the camera had changed. What follows is roughly what changed instead.
Why hockey is the hardest ticket in the building
Three things stack against you, and they compound rather than add.
The first is speed. A well-struck puck leaves the stick somewhere between 130 and 160 km/h at senior amateur level. Players cover the length of a rink in under six seconds. Whatever your reaction time is, it is not fast enough — which means the whole discipline is built on anticipation rather than reaction, a point I will keep coming back to.
The second is light. Most British rinks were built as leisure centres rather than broadcast venues. You are typically working with somewhere between 400 and 900 lux at ice level, often from ageing metal-halide or fluorescent fittings, sometimes mixed with newer LED panels that a previous manager installed over half the rink and never finished. That mixture is the real problem, not the quantity.
The third is the barrier. Unless you have a photographer's hole — a cut-out in the boards with a small removable panel — you are shooting through 12mm of acrylic that has spent a decade being hit with sticks, pucks and shoulders.
Hockey rewards preparation far more than reflexes. Arrive early, learn the building, and decide what you are shooting before the puck drops. Everything after that is execution.
Working with the glass, not against it
If the venue has photographer's holes, use them, but understand what you are buying. A hole gives you optically clean glass-free frames and a beautifully low angle, and it costs you a fixed field of view. You cannot pan past the frame of the hole. If the play develops behind you, you have lost it. I treat holes as a specialist position for one or two periods, not a place to live all night.
For everything else, you are shooting through the glass, and there are four habits that make the difference between a soft grey mess and a clean frame.
Get the front element flat against the acrylic. Not near it — on it. A rubber lens hood is worth its weight here; it protects both the glass and your front element, and it lets you press without anxiety. The moment there is an air gap you introduce reflections from the arena lights behind you, and those reflections are what destroy contrast.
Shoot wide open. An aperture of f/2.8 does not just gather light, it throws the scratches immediately in front of the lens so far out of focus that they stop existing. Stop down to f/5.6 and you start rendering every scuff on the surface as a soft grey veil. This is the single biggest reason fast glass matters in a rink, more than the shutter speed it buys you.
Find the clean panels. Every rink has them. Panels behind the benches take fewer hits. Panels at the far end from the home team's attacking zone are usually clearer by the second period. Walk the perimeter during the warm-up with your lens against the glass and photograph the far boards — the differences are obvious immediately, and they will not have changed by the time the game starts.
Angle matters more than cleanliness. A scratched panel shot square-on is far better than a clean panel shot at 30 degrees, because acrylic at an angle behaves like a weak prism and smears fine detail. If you have to choose, choose the perpendicular view.
Reading arena light before you shoot a frame
Ice is a giant white reflector, which sounds helpful and is not. It bounces the ceiling's colour straight back into every face, so if the ceiling is a mixture of warm halide and cool LED, the skin tones in your frames will change depending on which end of the rink the player is standing in.
Two habits fix most of it.
First, shoot a custom white balance from the ice itself during the warm-up, at both ends. If the two readings are within about 300K of each other, set one value and forget it. If they differ by more than that, you have a two-zone rink: I set white balance for the end where most of the action will be — usually the end the opposition defends for two of three periods — and correct the rest in post using two presets.
Second, watch for flicker. Older discharge lighting pulses at twice the mains frequency, so in the UK you get 100 cycles a second. At 1/1000s you are sampling a tenth of a cycle, which means consecutive frames in the same burst can come out visibly different in both brightness and colour. Modern bodies have anti-flicker or flicker-reduction modes that time the shutter to fire at the peak of the cycle — turn it on, accept the tiny drop in frame rate, and save yourself an hour of per-frame colour correction later.
Before the game, fire a ten-frame burst at 1/1000s at the far boards. Open them side by side. If the brightness pulses, you have flicker — switch on the anti-flicker mode and shoot the same burst again to confirm it is gone.
A settings baseline that actually holds up
I shoot hockey in manual with auto ISO, because the light does not change but the reflectivity of the subject does dramatically — a white away jersey against white ice is four stops different from a black home jersey against the boards, and any automatic exposure mode will chase that difference all night.
| Setting | Value | Why |
|---|---|---|
| Shutter | 1/1000s | Freezes skates and sticks. 1/1250s if the standard is high and the light allows. |
| Aperture | f/2.8 | Kills glass scratches, buys light, isolates the subject from a busy crowd. |
| ISO | Auto, capped at 12800 | Noise is fixable. Motion blur is not. |
| Exposure comp. | +0.3 to +0.7 EV | Meters underexpose against bright ice almost every time. |
| Drive | Mechanical or electronic first curtain, high burst | Full electronic shutter can band badly under pulsed arena lights. |
| File | RAW, mechanical | You will need the white balance latitude. |
The exposure compensation point deserves emphasis. Every evaluative meter sees a rink as an overexposed scene and pulls it down, so straight-out-of-camera frames come back grey and the players' faces sit in mud. Half a stop of positive compensation costs you nothing in a RAW file and saves the shadows where the faces are.
Autofocus: what to tell the camera to care about
Modern subject-detection autofocus is genuinely good at hockey, with one caveat: helmets and cages confuse face detection, so eye-detect will hunt. I turn face and eye priority off and use a small-to-medium zone with subject tracking set to prioritise the nearest moving object.
Three tuning points matter more than which body you own:
- Tracking sensitivity: low or locked. Hockey is full of players crossing in front of your subject. A responsive setting will happily jump to whoever skates through the frame. A sticky setting holds the player you chose.
- Acceleration tracking: high. Players change speed violently and constantly. This is the one parameter worth pushing to its maximum.
- Zone, not single point. Single point demands a level of hand-eye precision nobody sustains for sixty minutes. A zone of roughly a fifth of the frame gives the system enough to work with while still letting you choose the subject.
Then pre-focus. Between whistles, put focus on the spot where you expect the play to arrive — the top of the crease, the blue line, the far faceoff dot — and hold it there with back-button focus. When the play arrives, the lens has almost nothing to travel. That habit alone lifted my keeper rate more than any body upgrade.
Position by period, not by preference
The single most common mistake I see from photographers new to hockey is choosing one comfortable corner and staying in it for the whole game. Teams change ends. If you do not move, you will shoot two periods of one team's defensive zone and wonder why your gallery is unbalanced.
My standard rotation:
- Warm-up: ice-level detail frames — blades, pucks, tape, breath in the cold air. These are your gallery openers and they cost nothing to make.
- First period: corner position in the zone the visiting team is defending. Goalmouth scrambles, saves, rebounds.
- Second period: switch ends, then move to a mid-boards position for skating and body-check frames with more separation from the background.
- Third period: back to the goalmouth for the end where the game is likely to be decided, and stay there. If it is tight, the last five minutes is where the emotion lives.
- Post-game: handshake line, bench reaction, the goaltender pulling the mask off. Every club uses these and few photographers stay for them.
Elevated positions are underrated. A seat six or eight rows up removes the glass entirely, gives you a clean look at formations and power plays, and — with a long lens — produces the tactical frames coaches genuinely want. I try to spend one full period high in every game.
The five moments that always sell
Clubs do not buy technical excellence. They buy frames that make a supporter stop scrolling. After a few seasons the pattern is very consistent:
- The save at full stretch. Goaltenders are the most photogenic athletes in any sport, and a pad save with the puck visible is the frame that ends up as the club's profile picture.
- The goal celebration, from the front. Not the puck crossing the line — the face afterwards. This is why you stay in the attacking corner rather than chasing the puck.
- The check at the boards. Ideally with the glass flexing and a supporter reacting behind it. Two subjects, one frame.
- The bench. Coaches shouting, players catching their breath, water bottles. Nobody shoots enough bench.
- The handshake line. The most human ninety seconds of any hockey match, and almost always missed because photographers are packing up.
Staying safe and staying welcome
A puck deflected into the stands carries enough energy to break a camera and a cheekbone. Two rules keep me intact: never take both eyes off the ice for long, and never stand in the gap where a photographer's hole panel has been removed while play is at that end.
The social rules matter just as much. Introduce yourself to the rink manager and the team manager before you shoot, not after. Ask where you may and may not stand, and take the answer seriously even when it is inconvenient. If there are junior players on the ice, check the club's safeguarding and photography consent policy first, get written permission from the organiser, and honour any request from a parent to withhold an image without argument or discussion.
Photographers get access because clubs choose to give it. That access is far more valuable than any lens.
What I actually carry
Two bodies, because a lens change at ice level takes thirty seconds you do not have and invites moisture onto the sensor. A 70–200mm f/2.8 on the long body covers most of the rink from a corner. A 24–70mm f/2.8 on the second body handles benches, the handshake line and anything that happens within three metres of me.
Beyond that: a rubber lens hood, a microfibre cloth in every pocket, spare batteries kept warm in an inside pocket because cold rinks eat charge, and a small folded mat for kneeling on freezing concrete. Nothing exotic. The rink does not care what your gear costs — it cares whether you knew where to stand when the goalie stretched.
Arrive ninety minutes early. Walk the boards, test the panels, set your white balance, check for flicker, and photograph the warm-up. The photographers who consistently deliver are the ones who did their thinking before the first puck drop.
Thomas Brown is a sports and documentary photographer based in Newport, Shropshire, with an MA in Photojournalism & Documentary Photography from the University of the Arts London. Get in touch about a fixture, a tournament or a commission.